The old saying was that photography was painting with light. But is it really? I would put forward that photography is rather more painting with dark.
With today’s fully automatic cameras, “light” is no longer a problem. Light can be found by changing ISO, shutter speed, apertures and even turning your back to the sun.
Getting to grips with the concept of “light” is an important factor for photography, and good photographers are the ones who have learned how to harness it.
Unfortunately, with the sophistication in cameras these days, the casual photographer can be excused for thinking that there is nothing to getting good shots. Set the camera’s mode to G for Great pix and the electronic ‘smarts’ does the rest. Pity about chaps like Ansel Adams who used to set up his camera and then wait hours if necessary to get the best light resulting in the magnificent photos he has left us.
However, the most important equipment for any new photographer is a notebook and two pens as one always runs out at the “decisive moment” (with apologies to Cartier Bresson).
Let’s make things easy for you with light and dark. Set the shutter speed for 1/30th and let the camera decide what aperture is needed. Take your shot and review critically. Too bright? Too dark? Now change the aperture and try again. You will eventually get a shot that you like, and you note the settings in your trusty notebook.
Using those settings, you will be close to where it needs to be with a similar shot. You now have a baseline and you can experiment from there.
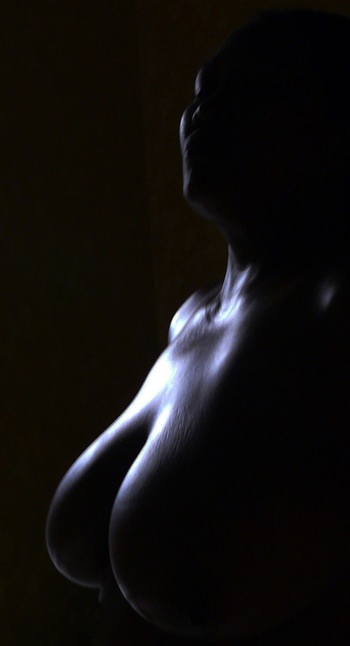
Let’s get some spectacular low-light photographs. If you have a tripod, dust it off, but even if you haven’t, continue. We are about to explore the dark.
Go to your local markets and take some photographs using just the stall-holder’s naked bulb for illumination. Be prepared to lean against a telephone pole to stop camera shake. But give it a go.
Now try photographing some of the hotels at night. Most are quite brightly lit and once again, you may end up very surprised. Even try some portraits lit by candles only. Use your imagination, and not the flash!
Take, for example, photographing the waves rolling into the shore. The white caps on the top of the waves look great, but to get that shot you need to have the sun coming from behind you, at an angle that is almost parallel to the beach. This way the water remains dark, but the white caps catch the sun’s rays and show very brightly.
So how do you get this shot? Well, you have to find a beach where the early morning sun’s rays go out to the sea. If you can’t find one, sometimes the late afternoon sun will then be coming from the direction you want. This is something that your fancy e-camera cannot replicate.
And those two times – early morning and late afternoon have always been the best times to get good shots. “Cold” ambience in the early mornings and “warm” ambience in the afternoons. You can use an 81A or 81B “warming” filter, but the end result is not as good as that coming from the ethereal light technician.
The next confusing aspect is that the photographic color rendition and the human eye do not see the colors with the same intensity. The usual camera colors are ‘balanced’ to around 5,000 K, so light sources lower in color temperature will look orange, even though it does not look orange to the naked eye. This is why tungsten light sources produce the orange hue. However, when you balance the color, the light is balanced against tungsten light by exposing it to a blue tinge, so this time the light bulb will look white. Slightly confusing.
You also do not have to know the degrees Kelvin table off by heart to get some different photographs when you turn the flash off. The main thing to remember is that the color you perceive via the naked eye, is not necessarily the color you will get in your photograph, but if you know your Photoshop, you can correct post production.

 |
 |
 |


