Getting to grips with the concept of “light” is an important factor for photography, and good photographers are the ones who have learned how to harness it.
Along with the light there comes the “dark” which is another factor that good photographers are aware of (ended the sentence with a preposition, sorry Mr. Editor).
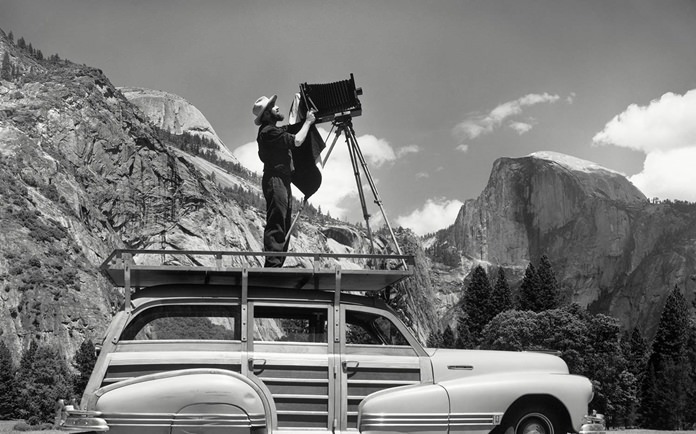
Unfortunately, with the sophistication in cameras these days, the casual weekend photographer can be excused for thinking that there is nothing to getting good shots. Set the camera’s mode to G for Great pix and the electronic ‘smarts’ does the rest. Pity about chaps like Ansel Adams who used to set up his camera and then wait hours if necessary to get the best light to result in the magnificent photos he has left us to enjoy.
In actual fact, it is pity upon us with our new cameras which do everything for us – but they can’t change the position of the sun! And much of photography is to do with harnessing the rays given to us by the great lighting technician in the sky.
Take, for example, photographing the waves rolling into the shore. The white caps on the top of the waves look great, but to get that shot you need to have the sun coming from behind you, at an angle that is almost parallel to the beach. This way the water remains dark, but the white caps catch the sun’s rays and show very brightly by contrast.
So how do you get this shot? Well, you have to find a beach where the early morning sun’s rays go out to the sea, in other words from behind you. If you can’t find one facing the right way, sometimes the late afternoon sun will then be coming from the direction you want. This is something that your fancy e-camera cannot replicate.
And those two times – early morning and late afternoon have always been the best times to get good shots. “Cold” ambience in the early mornings and “warm” ambience in the afternoons. You can use an 81A or 81B “warming” filter, but the end result is not as good as that coming from the ethereal light technician. I only use an 81A when the sky is overcast, or misty grey, but it is a filter worth keeping in the bag, (The Skylight filter is for counteracting UV light – and left permanently on the end of the lens is a safeguard.
Let’s get some spectacular low-light photographs. Firstly, inactivate the flash, but turn on the automatic mode for your camera. If you have a tripod, dust it off, but even if you haven’t, continue. We are about to explore the 1000 K to 2000 K end of the scale.
Go to your local markets and take some photographs using just the stall-holder’s naked bulb for illumination. Be prepared to lean against a telephone pole to stop camera shake. But give it a go. You have nothing to lose.
Now try photographing some of the hotels at night. Most are quite brightly lit and once again, you may end up very surprised. Even try some portraits lit by candles only. Use your imagination, and not the flash!
For interest’s sake and some technicalities, I mentioned color temperatures which is a term that we photographers borrowed from physics. However, the photographic color temperature is not exactly the same as the color temperature defined in physics, as photographic color temperature is measured only on the relative intensity of blue to red. However, we borrow the basic measurement scale from physics and we measure the photographic color temperature in degrees called Kelvin (K).
The next confusing aspect is that the photographic color rendition and the human eye do not see colors with the same intensity. The usual camera colors are ‘balanced’ to around 5,000 K, so light sources lower in color “temperature” will look orange, even though it does not look orange to the naked eye. This is why tungsten light sources produce the orange hue. However, when you balance the color, the light is balanced against tungsten light by exposing it to a blue tinge, so this time the light bulb will look white. Try manipulating color temperatures this weekend.

 |
 |
 |


