The column this week was written by Peter Brock, a very experienced photographer from the North. The subject matter is one we can never emphasize too much. Correctly handled, flash can raise any photo from “ordinary” through to Wow!
Over to Peter:
Many people seem intimidated about flash photography. There are so many uses for a flash, it is no wonder almost all professionals have a very good working knowledge. Photography is all about lighting. There is no reason you cannot begin to explore this incredible tool. Of the myriad of uses, we are going to cover just one in this article: fill-flash or flash to balance exposures between a brightly lit subject and a poorly lit subject close to the camera.
Cameras do not have the ability to capture everything that may be in a photograph at the proper exposure. Many people take a photograph on a boat or in a high contrast area and are surprised that the subject they really wanted is very underexposed, or that the subject is properly lit, but that the background is terribly overexposed. Also, since the camera may be trying to average the exposures, the result may be that neither the subject nor the background is properly exposed. In these situations, a flash is an invaluable tool.
The goal of this article is to get you to start playing with your flash and having fun learning about what it can do. Hopefully you can start and see what it can do to help get proper balanced exposures. Even iPhones have a flash function, but one must turn it on manually. It is not a powerful flash, but it can get you started.
Often people may be sitting in a shaded area and the outside is spectacular, yet bright. So, the method for this type of shot is to take a reading for the outside garden or whatever, and then use flash to fill in the things closes to the camera.
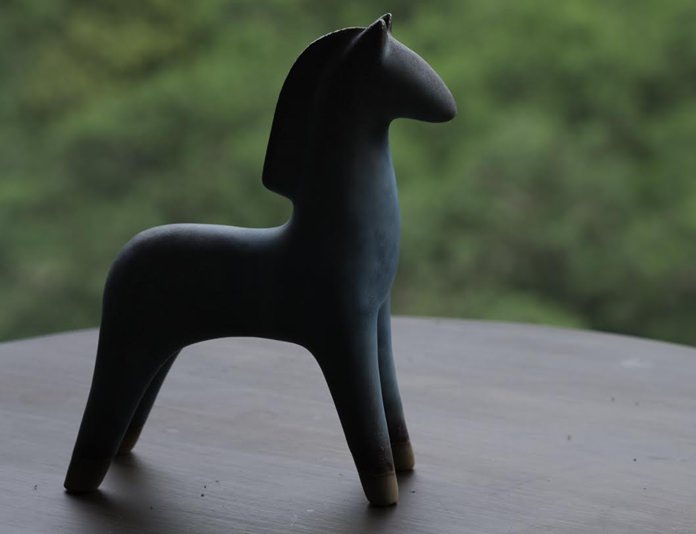
The two shots below were taken in about three minutes. As you can see, they both have the backgrounds exposed as desired, but in the first one, the horse is terribly underexposed. What was done to balance the exposures as in the second image was simply to keep the aperture and shutter speed set for the outside and use a little flash to fill in the horse.
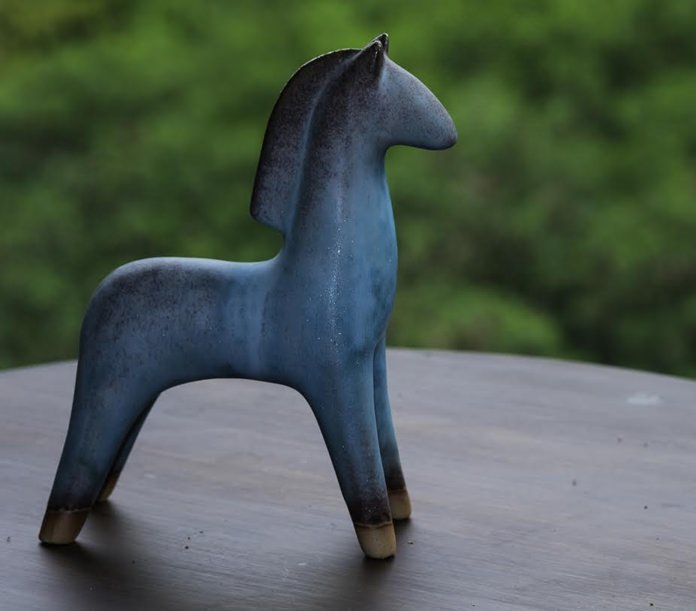
The same principal applies to photographing anything in this kind of setting – set your aperture and shutter speed (typically 1/250 if you are using flash) for the background as you want it, and then pop your flash for the objects close to you. Flash does not carry very far as light falls off very quickly so there is no reason to fear overexposing the background. A simple way to see this is to put an object a meter away and another one 4 meters away. Assuming the one closest to the flash is properly exposed, the one farther away will not have any difference in light from how it was metered.
One contributing factor to your ability to use flash is to learn how to shoot manually. The new cameras these days have such incredible displays and features that you can learn to set the shutter speed (typically a flash requires a 1/250 or less sync speed) and then you can adjust the aperture to what you want to get the exposure you want in the background. One thing to learn is that the shutter speed controls the ambient and the aperture you choose controls the amount of flash.
There are thousands of pages written about lighting, but with today’s great flashes, there is no reason not to take advantage of them as tools. Hopefully you will begin to play with them because they open up whole new worlds to your photography.

 |
 |
 |


