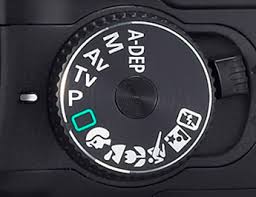
I had reason to look at the Mode Dial on my camera on page 5 of the instruction manual. It is not the world’s fanciest camera, but has nine “modes”, five alphabetic and four of those funny little symbols, which I believe are called pictograms.
This week’s column is then designed for all the weekend warriors who have a nice camera, but are really are unsure of what all the controls, winking lights and strange icons mean, and when they should they bring these functions into play.
The first aspect to be considered, is why do we need all these optional modes and settings at all? Today’s very sophisticated cameras will take passable pictures in the everyday point and shoot mode, usually called the Program AE Mode and shown as the letter “A” mode, so why bother?
That one is easy to explain. It all hangs on the word “passable”. The automatic brain in your camera is pre-set to return “average” values and you get the same result in your photo – “average”. If you want a little more, or a little better, then you have to look at taking some more control of the camera by inputting data that you want, not what it thinks you want!
Let’s take the mode that I use most – the Aperture Priority setting. On most cameras this will be an “A” or “AV” and purely means that you set the aperture, and the camera will work out the shutter speed for you. Clever little camera isn’t it! Now when would you use this setting or function? Generally it is when you want to control the areas of your photograph that will be in sharp focus. This is called the Depth of Field.
The aperture is measured in “f stops” and with most cameras ranges from f2.8 through to f22. Now the easiest way to work out which f stop to use is by remembering the following dictum – if you want BIG depth of field (everything in focus) then use BIG f numbers (e.g. f22) but if you want SMALL depth of field, then use SMALL f numbers (like 2.8). So if you are going to take a landscape you use the “A” setting and you select f22. Likewise if it is a portrait of someone use “A” setting again and f4.
The next most popular setting is the “S” mode, otherwise known as “Shutter Priority”. Similar to the “A” setting, but this time you set the shutter speed and the camera will work out the appropriate aperture for you. Shutter speeds generally range from a slow 1 second through to a fast 1/2000th of a second, though some cameras are even faster. Now when do you want this feature? You need to set the shutter speed when you want to control movement of your subject. The dictum here is also similar – if you want to stop a FAST object (like a moving car) then you use a FAST shutter speed, but if you want to show SLOW movement use a SLOW shutter speed. All very simple, isn’t it?
Now experience will tell you whether you use the extremes of Aperture or Shutter speed, but generally if I want to stop movement I will use 1/1000th of a second and if some blurring is wanted to show motion, I use 1/15th of a second.
After you have experimented in manually choosing your own settings, then you will be ready for the next big step – selecting “M” on the camera. “M” is for Manual and here you dictate both shutter speed and aperture. This allows you to select “different” exposures to produce different effects. When on “A” or “S” or “Auto” the camera will give you an “average” exposure. But if, for example, you want a moody dark photograph at sunset then you need to manually set both the shutter speed and the aperture.
So this weekend, be brave and tell your camera who is boss! You will increase your enjoyment in taking photographs, and get some great photos as well.

 |
 |
 |


