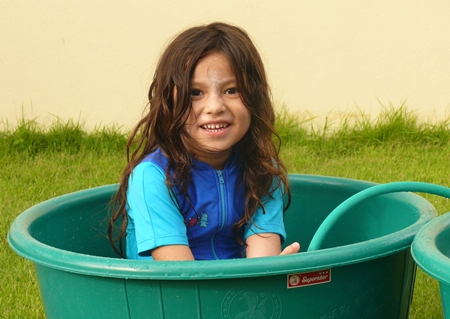
My eldest son has a toddler and he sent me a photograph of his offspring. Unfortunately the shot looked as if the little chap had short legs and a large head. Having seen previous photos of the young fellow, I knew this was not the case. What was amiss was the wrong choice of lens and the wrong position to shoot from.
This photo was the result of using an 18 mm wide angle lens, which always makes close objects seem larger than those further away, and the photograph being taken from adult eye level.
Both of these conditions are easily understood. Capturing children with a camera is not an easy task. Children have a nano-second attention span and if you miss that nano-second, be prepared to wait hours for the next available one!

The music hall comedians always worked on the principle that they should never get on stage with children or animals. There were many good reasons for that, one of which was the fact that neither took stage direction very well.
The biggest problem is that children have the attention span of three point four nano-seconds (if you’re lucky) and to expect kiddy co-operation while you spend time setting up the shot, focussing and finding the best lighting is to fly in the face of reality. No, to get a good kid pic means that you have to be totally set up and ready. That means you must begin with an idea of how you want the end result to look.
Let’s look at the equipment needed first. In general, the further away you get, the more natural the photograph you will get. So, a small zoom lens (35-70) works very well in this situation as you can get far enough away from the child without invading the child’s ‘personal space’ and producing shyness or forced behavior.
Focussing is important, as it is for all photography, and I generally use the “pre-focus” technique in this type of situation. When you have found the position you want to shoot from, then focus on where the child is and “lock” that focus into the camera. When suddenly see the shot you want, you won’t have to waste time trying to focus.
The most important item with child photography is to get down to their level, otherwise by shooting from above you get distortions and the “strange” view of the child I mentioned at the beginning of this article. Since children are fairly mobile creatures, you do need to get a reasonable depth of field to keep the subject in focus. There are a couple of ways to ensure that this happens. The first is to select an ISO of 200. This means you can use a smaller aperture (or your camera can select it, on “auto” settings). This increases the depth of field, keeping your subject in a deeper area of sharp focus. The second is to photograph in good light, which again means the camera can select small apertures.
Now let’s get down to the nitty gritty of taking the shot of your terrible two year old. Put little Johnny in a well lit area of the house, patio or garden with some favorite toys. Sit down on the floor a little way from him and pre-focus the camera. Now just sit there, not joining in to his play world, looking quietly through the viewfinder. Remember that you do have a limited time before Mr. Two gets bored and wants to wander off.
When everything is right, call out the child’s name and catch the child’s first response to you. The inquiring look, or the big smile, will be there to be caught forever on film. You can repeat that exercise perhaps three times before the child will not respond any more, no matter what you do! As I said at the beginning, these little creatures have a very short attention span. Be prepared, be ready and be watchful and you too can get that ‘magic’ shot. But be ready to shoot quite a few frames before you will get the one you want.


