Read an interesting article on ‘white balance’, making out that this was something new and magical experienced only with digital photography. Let me assure you, it isn’t new, it isn’t magical and it isn’t the sole situation vis-à-vis film and digital photography.
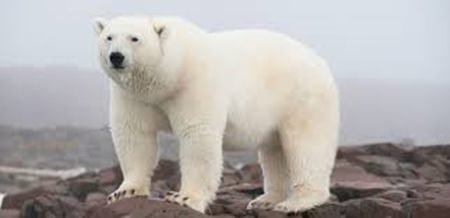
Have you ever tried to photograph a polar bear? Or a black cat? Or even a white car, or a plain black one? If you use an automatic camera set on A (for “amnesia”) then the chances are very high that you ended up with a grey polar bear and a grey cat. Very highly likely. The reason for this is the magic photographic number known as 18 percent grey!
All photographers should become acquainted with the color known as 18 percent grey. Why? Because after you understand 18 percent grey, you have complete control over blacks and whites in your photographs – and by that, I mean in color photography, not just the B&W kind.
The really dedicated photo buffs will recognize 18 percent grey as being the cornerstone of the “Zone System” and Ansel Adams superb prints are trotted out with sage mutterings that if you understood the zone system, then your photos would look like his too. This is, of course, BS. Ansel Adams spent hours painstakingly printing his B&W work, specifically burning in some areas, holding back others and if you think he didn’t then think again.
However, here is the “short course” on the Zone System. What you have to remember is just the simple fact that the meter in your camera knows intimately what is 18 percent grey, and is programmed to produce as much 18 percent grey as possible. In other words, point the camera at your subject and the meter will work out a combination of shutter speed and aperture to give an exposure to get the whole shot as close to 18 percent grey as possible. This is irrespective of whatever name the camera manufacturer gives to the metering system.
Now this works for the majority of shots – 18 percent grey is close enough, and the Photoshop can adjust the rest from there – but it is always a compromise. You do not even realize what a compromise it really is until you take a photograph of that aforementioned white car or a black cat, and see that it has been printed grey.
This is one reason why I keep on saying that if you run the camera in the fully A for automatic mode, you will only get A for “average” pictures. What you have to do to get whites or blacks is to run the camera in the metered manual mode instead. Remember that when you are photographing the white car the exposure indicated by the camera is the one that will make the white car 18 percent grey. To get the car back to white it will need more light on the film.
Here’s what you do. Imagine your camera tells you that the exposure should be f16 @ 1/60th of a second. You need more light to fall on the emulsion, so make your exposure f 11 @ 1/60th and another at f8 @ 1/60th. That gives you both one and two full stops of light more. One of those two will give you a white car, irrespective of such fancy terms as automated multi-phasic metering, center weighted metering or whatever.
Now when photographing a black object, the camera meter will indicate a shutter speed and an aperture to give you another 18 percent grey object. There is too much light this time. What you have to do is cut down on the amount of light getting into the camera. Again imagine that the indicated exposure is f8 @ 1/60th. You want to darken things, so take two shots with one at f11 @ 1/60th and another at f16 @ 1/60th. Again this is one and two stops decrease in light levels. One of these will give you a black cat!
Put the camera in metered manual mode and then if you are photographing something white, give it one and two stops more light than indicated. Conversely, if photographing something black, set the camera for one and two stops less light than indicated.
 |
 |
 |


