When you mention night photography, for many people this brings out images of gumshoes taking sneak shots through bedroom windows. This week’s column has very little in common with private eyes or bedroom windows, so if you were hoping for something salacious this isn’t where you should be reading.
What I want you to do is to look at the ‘mode’ selector on your camera and turn it on to ‘manual’, as this can open up an entire new world. You bought an SLR because of its capabilities to take different photos, and for you to have fun experimenting with taking ‘real’ photographs and not just ‘record’ shots. (A ‘record’ shot is one of Aunt Maude on the beach for example, ‘recording’ that she was there, with no real input from the photographer.)
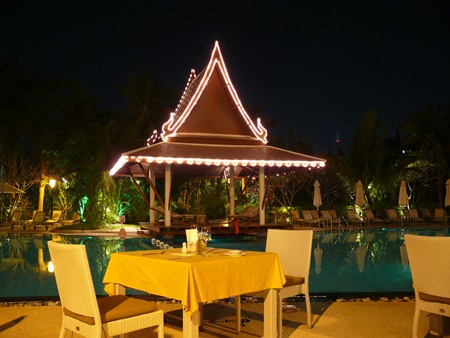
Let’s get down to it. How many times have you taken “time exposure” images with your camera? Probably “never”! That is the usual response to that question. The reason for this is simple. It all sounds too complicated, you need to have a tripod, don’t know how to work it out, the list goes on. It is a shame, because you can get some spectacular shots with time exposure and it really isn’t all that difficult these days!
Let’s address the “too technical” first. A camera is purely a device that lets a certain amount of light fall onto electronic sensors for a predetermined amount of time. This is the old “f8 at 1/60th” sort of routine, (also known as the photojournalists creed – f8 and Be There!). The number of the “f” stop (the aperture) tells you how large the hole is that lets the light in, and the 1/60th denotes how long the hole was left open. Is that really technical? No!
What do you need for Time Exposure photography? Well, a camera is a good start, but it has to be one with “T” or “B” settings. The “T” setting stands for Time Exposure – one “click” opens the shutter, the second “click” closes it. “B” originally stood for “bulb” and the way that works is by holding the shutter release down keeps the shutter open until you take your finger off, which closes it. Why two settings? Simple, use “B” for time exposures up to a minute and “T” for longer ones (mainly because your finger will go numb holding the button down for 20 minutes!)
What ISO speed rating should you use? I am sure your DSLR has 400 ASA which is fine (but you can use anything, I generally just use the standard 100 ASA I use for everything). Now you may have read about “reciprocity failure” with long time exposures. Give up reading! It’s photo industry techo-talk and won’t stop you getting good pictures, it just could change the colors a bit with film, but with digital cameras this is not a worry either, most digitals compensate by themselves.
The final piece of equipment you need is a tripod, but even that is not 100 percent necessary. But it is easier with one.
The important point to grasp, is that all Time Exposure photography is “hit and miss”. There’s no real way anyone can tell you exactly “f8 and 24 seconds”. There’s too many variables, but all you have to do is to take the same scene or picture with several different exposure times – one of them will be right. Believe me!
Here’s the rough guides. In all of these the aperture (f stop) is set on f8. Now to take a street scene at night, try 2 seconds, 4 seconds and 8 seconds. For the interior of a room, lit with ordinary light bulbs, try 5 seconds, 10 seconds and 20 seconds. To take a picture, just before dawn try 5, 10 and 20 seconds. Now, for a completely dark, night landscape (or seascape) try 30 seconds, 1 minute and 2 minutes. And for a different sunset, try one second and half a second.
Make a note of the order your time exposures were shot in, and note the “best” result. Sure, sometimes the results are ‘different’ – but if you wanted a “normal” shot you’d have taken it in daylight!


