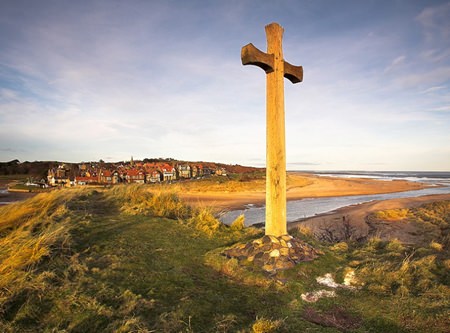
Now that you have your new Xmas camera, how about exploring Landscape photography? Is it easy? Point the camera at rolling fields and push the button. Another great shot – or is it?
How many good shots do you expect from every 100 shots you take? 99? 100? 10? 1? I was thumbing through a photography magazine the other day and it had three pro photographers discussing how they go about bringing back great landscapes (and seascapes). Two chaps were happy with one great shot in 360 images (gasp!), while the other of the interviewed pros said he expected every shot to be perfect, but he didn’t pop the shutter until he was sure he had every element in the shot correct. Personally, I think he must hang about for a long time waiting.

Again, when the three were asked what the principal elements were to get a “WOW” landscape, two of them went straight to the light factor, citing the quality of light. Perhaps one of the greatest reasons your landscapes may fail is because you are not prepared to get up early enough to get the cold morning light, or are prepared to hang around long enough to get the warm sun just before it dips behind the horizon.
When asked about their extra gear they consider necessary to be professional landscape photographers, two said a tripod and the third wanted Blu-tack to keep his filters in place and a notebook and pen!
Looking at representative works from all three – and all were excellent shots, by the way, the use of the tripod was obvious to the trained eye. Soft ‘milky’ or frothy seas showing a long time exposure, or ‘filmy’ tree foliage were the giveaways, along with the incredible depth of field which results from the aperture settings of around f22, minimum, allowing depth of field sharpness all the way through the shot.
Another commonality was the ISO rating they used, with all of them going for 50 ASA for great detail, but you should also remember to bracket the exposures about half a stop either side of that indicated by the exposure meter.
One feature that was also evident, looking at their shots was attention to foreground detail, as well as the important features further back in the frame. All of them spent much time positioning the camera so that they had something of interest. For example, a shot of sea with an island in the background had beach rocks in the foreground. And all were in focus. That’s the tiny aperture again. They will even use a Neutral Density filter as well as the time exposure to keep that small aperture open longer. (A tip when using ND filters – focus without the filter in place, lock the focus and then put the filter on, otherwise it is too hard to see the individual items in the shot in the darkened viewfinder.)
As far as the best piece of advice they were given, they went for an alarm clock to get them out of bed early, so they did not miss the magic light of early morning. (Being a night person, who has difficulties with early mornings, is why I do not consider myself a good landscape photographer!)
To look at the final situation, from the words of the three pro shooters, if you want to get good landscapes then you need a camera with sharp lenses, get yourself a tripod – and use it to be able to have very slow shutter speeds, and practice with different lenses. Wait for the light to be right (the more horizontal the sun’s rays, the better) and don’t bother if it is all wrong. One guy waited six days to get the light right for one lakeside shot! Make sure you have some interest in the foreground and get the deepest depth of field that you can.
Do all of that and you will be bringing in those breathtaking landscapes too! And for a change do try and use polarizer filters. It is sometimes harder to use but the results are better. However, be careful that with an ND filter and a polarizer you may get vignetting in the corners of the image.


