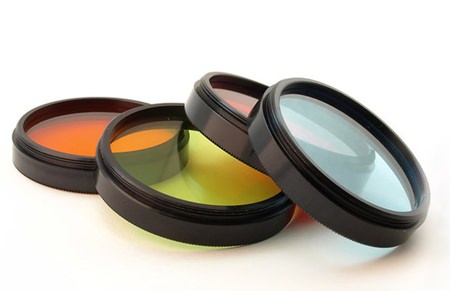
“New” photographers tend to splurge on filters, happily screwing on the latest filter purchase, no matter whether the subject matter will be enhanced by the addition on the front of the lens.
Now, before discussing the different filters and what can be done with them, there is one step that should be done beforehand – and that is to standardize the diameter of your lenses. This is done with stepping rings, and in my case I selected 62 mm. This then means that my filter collection (62 mm) will screw onto any of my lenses. Being larger, it also means I am less likely to get a vignetting effect (losing the edges of the image), even with stacking two filters on together.

So here’s what I think you should have. The first one is called simply a Skylight 1A. This filter does make the sky a little deeper, but the main reason to have it is as a sacrificial piece of glass, so that your good, expensive lens does not get scratched. Skylight 1A’s are very cheap.
Soft romantic effects can be produced in many ways, and here are a few tried and true methods, and the first is super inexpensive as well. Just gently breathe on the Skylight 1A filter just before you take the shot. Your warm breath will impart a “mist” to produce a wonderfully misty portrait, or that early morning mist look for landscapes. Remember that the “misting” only lasts a few seconds, so make sure you have the camera pre-focussed and ready to shoot. If you have control over the aperture, try around f4 as well.
Another interesting result is by smearing Vaseline on the same Skylight 1A and seeing the different effects you get. Do not smear the Vaseline on the end of your lens. It is impossible to get off without washing in hot soapy water, something you can do with a filter, but not with your lens.
One of the nicest filter effects is what is called “center spot soft focus”. Now this just means the center is in focus and the edges are nicely soft and blurred. This effect is used by portrait and wedding photographers all over the world to produce that wonderful “romantic” photograph.
Now to use this filter. If you have an SLR (single lens reflex) camera or a digital, you actually look through the lens when you are focussing and what you see is what you get (the WYSIWYG principle, mentioned many times in this column). Set your lens on the largest aperture you can (around f5.6 or f4 is fine). Focus on your subject, keeping the face in the center of the screen. Now bring up your magic soft focus filter and place it over the lens and what do you see? The face is in focus and the edges are all blurred! Try some different f stops as well (it makes the center spot larger or smaller) and record the details in your trusty notebook!
You can also use these filters with any compact point and shoot camera, but it is a little more hit and miss, as there’s no WYSIWYG with compacts. What you have to do is position the center of the filter over the lens and, while keeping it there, bring the camera up to your eye, compose the shot and then shoot. Takes some fiddling and manual dexterity and take a few shots as you are really flying blind.
The next one is the polarizer. I have mentioned polarizers before, but the difference between polarized sunlit shots and unpolarized is incredible. The depth of color when you polarize is fantastic. As you rotate the polarizing filter, the reflections on any shiny surface, be that grass, trees, water or whatever, just disappear, leaving the undiluted bold color.
There are many more filters, colored effects, graduated effects, star cross and more. Filter photography is fun.
And yes, I know that your favorite post-production Photo-Shop or whatever can give you electronic filter effects, but it isn’t as much fun as looking through the viewfinder, deciding on the effect wanted and the filter to do it, and knowing what you are going to get. WYSIWYG again!


